Octopress常用的語法
1.建立文章 正常的情況下執行此行:
$ rake new_post['how-to-use-octopress']
但如果你使用的是zsh shell的話, 就必須這樣打:
$ rake "new_post[how-to-use-octopress]"
2.建立/更新
$ rake generate
每一次只要有執行過rake rake new_post來產生文章之後, 都必須使用下列指令, 之後在網頁重整才能看到剛剛建立的文章。
3.本機預覽
$ rake preview
可以在http://localhost:4000上預覽Blog, 順便一提, 如果只是修改文章內容, 其實只要重整就可以看到修改後的變化, 換言之…只有執行rake new_post之後, 才需要再執行rake generate。
4.寫完文章之後要上傳至Github
$ git add .
$ git commit -m 'OK, push.'
$ git push origin source
5.佈署部落格
$ rake deploy
記得佈署前都應該要先做第4點的動作, 佈署完成就可以到http://user_name.github.io看看部落格最新的狀況囉。
在別台電腦也要使用Octopress
很多人常常也會有兩三台電腦(筆電/桌機), 所以也會有不同電腦使用Octopress的需求, 要注意的是一般文章原始檔或圖片都放在soruce的分支。 首先一樣安裝完Octopress並進入該目錄。
$ git clone git://github.com/imathis/octopress.git octopress
$ cd octopress
然後, 按照步驟先綁GitHub
$ rake setup_github_pages
rake setup_github_pages這個動作會做以下幾點:
(1)要你輸入Repository的路徑,這時請將Github上面SSH的路徑複製下來貼上,如git@github.com:luckily/luckily.github.io.git
(2)把你的 octopress remote source name 從 origin 改成 octopress
(3)把你剛剛輸入的git repostiry 換成 default origin remote.
(4)切換你的 branch from master to source.
(5)Configure your blog’s url according to your repository.
(6)Setup a master branch in the _deploy directory for deployment.
感謝:printf(“ I’m EricWang ”)來源解釋這段:D
依照指示輸入https://github.com/your_username/your_username.github.io), 完成之後接著輸入下面那行git指令, 把原始檔下載下來
$ git pull origin source
下載下來OK之後, 當然還是要輸入下面這幾行, 才能用rake preview來本機觀看囉!
$ bundle install
$ rake install
$ rake generate
Octopress好用的功能
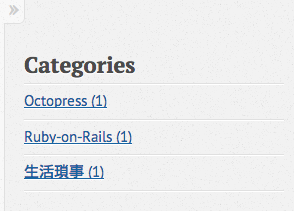
加上分類列表和標籤雲
安裝起來很簡單請參考以下資源幫 Octopress 加上分類列表和標籤雲或是官方
(1)去官方下載plugins
(2)把這三個檔案tag_cloud.rb、category_list.html、tag_cloud.html放到相對應的位置
.
├─ plugins/
│  └── tag_cloud.rb
└─ source/
   └─ _includes/
      └─ custom/
         └─ asides/
            ├─ category_list.html
            └─ tag_cloud.html
(3)編輯_config.yml
1 2 3 | |
(4)執行rake generate
完成之後就會像這樣~呼!!

如果不幸的git pull的時候發生錯誤
error: Your local changes to the following files would be overwritten by merge:
  Gemfile.lock
  Rakefile
  _config.yml
Please, commit your changes or stash them before you can merge.
打在終端機打上git指令git status發現有三個檔案沒有commit所以不讓我merge!
# On branch source
# Changes not staged for commit:
#   (use "git add <file>..." to update what will be committed)
#   (use "git checkout -- <file>..." to discard changes in working directory)
#
# modified:   Gemfile.lock
# modified:   Rakefile
# modified:   _config.yml
#
no changes added to commit (use "git add" and/or "git commit -a")
有兩種方法, 第一種:是直接commit, 之後merge.
$ git add . && git commit -m 'commit file before merge.'
$ git pull origin source
第二種:我當下的作法, 是把所有的檔案都先checkout掉…就OK了= =
$ git checkout -- Gemfile.lock Rakefile _config.yml
$ git pull origin source